The Tarnished's Guide to Starlight Shards in Elden Ring
Discover the secret power and locations of Starlight Shards in Elden Ring, unlocking rare Spirit Ashes and maximizing your adventure's rewards.
Scattered like forgotten promises across the Lands Between, Starlight Shards remain one of Elden Ring's most enigmatic and sought-after resources. These celestial fragments, always found in the company of ancient stone astrolabes, are far more than simple trinkets. While their surface-level function as a slow FP recovery consumable might tempt the unprepared Tarnished, veterans of 2026 know their true value lies elsewhere. Each playthrough offers a finite bounty of 23 of these shimmering prizes, a number that thankfully refreshes with each journey into New Game+. However, three notable regions—the Consecrated Snowfield, Haligtree, and the crumbling Farum Azula—strangely hold none of these stellar fragments, making their distribution across the other lands all the more crucial to understand.
For the discerning adventurer, using a Starlight Shard for its listed purpose is akin to using a legendary smithing stone to hammer a nail; it's a profound waste of potential. Their primary and most valuable use is as currency with the enigmatic and often unsettling Preceptor Seluvis. By bringing these shards to him, players can purchase powerful Spirit Ashes, expanding their arsenal of spectral allies. A full collection from Seluvis requires a minimum of ten shards, a notable investment given that choices within certain questlines, like those involving Dolores the Sleeping Arrow and the Dung Eater, make acquiring every ash in a single cycle impossible.
🌟 Limgrave: The First Four Fragments
The journey begins in Limgrave, home to four Starlight Shards. One is a straightforward find: from the Stormhill Shack, head directly south, leaping over ruins to find an astrolabe perched precariously on a cliff's edge, a silent sentinel overlooking the turmoil below. Another requires a bit more navigation; starting from the Agheel Lake South Site of Grace, travel south and use a Spiritspring to vault behind a bandit camp, claiming a shard from a cliffside altar without engaging a single enemy.
The third in the Weeping Peninsula, south of the Beside The Crater Grace, involves a quick climb up a hill, easily traversed with Torrent. The fourth, however, is a quest reward as intricate as a Carian clockwork mechanism. To earn it from Sorceress Sellen, a Tarnished must:
-
Free her from the Mad Pumpkin Head's guard.
-
Locate Master Azur in Mt. Gelmir and obtain his legendary spell.
-
Find Master Lusat in the Sellia Hideaway of Caelid and retrieve his spell.
Only upon delivering Lusat's spell does Sellen part with a Starlight Shard.
💎 Liurnia of the Lakes: The Motherlode
Liurnia, the realm of sorcery and moonlit intrigue, is veritably lousy with Starlight Shards, boasting 12 of the 23 total. One is easily accessed: from the Artist's Shack, head south and break right before a wooded area to find an astrolabe on a cliff facing the grand academy of Raya Lucaria.
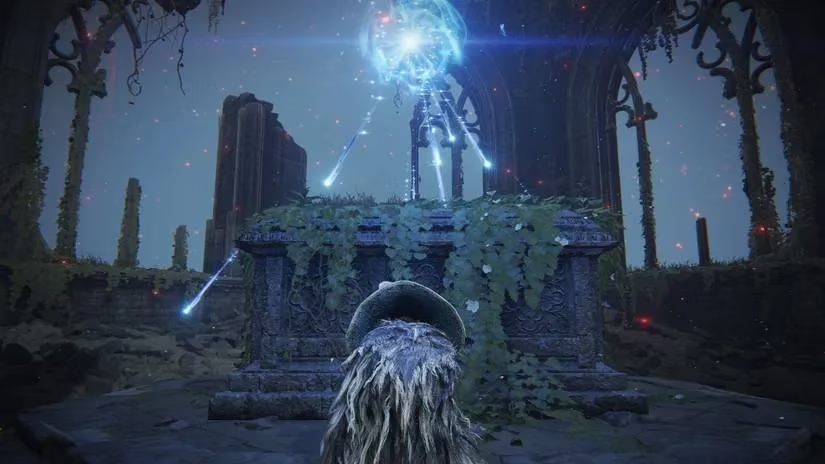
The remaining 11, however, are locked behind the lengthy and pivotal questline of the witch Ranni. Upon its completion, which includes reaching the Moonlight Altar and defeating the dragon Adula, the Tarnished gains access to the Manus Celes cathedral. Here, a treasure trove awaits:
-
10 Shards are found inside the main building of Manus Celes.
-
1 Additional Shard sits just outside, next to its own astrolabe.
This makes Ranni's quest not just a narrative essential, but the most efficient Starlight Shard farming route in the game.
🦂 Caelid: Two Distant Stars
The scorched lands of Caelid hold two shards, isolated and stark against the scarlet sky. The first is in the north, reachable early via the teleport trap near the Third Church of Marika or later by progressing past the Greatbridge. It sits on a cliffside accessible only from the northwest. The second is a simple prize: west of the Caelid Highway South Site of Grace, an unguarded astrolabe waits on a hill, plain as day.
🌋 Mt. Gelmir & Altus Plateau: Trials of Fire and Poison
Mt. Gelmir holds a single, notoriously difficult shard. It rests in a nest at the Ninth Mt. Gelmir Campsite, jealously guarded by the Full-Grown Fallingstar Beast—a boss fight as punishing as a tectonic plate shift. Attempting to grab the shard and flee is a dangerous gamble against the beast's speed and reach.
The Altus Plateau offers two shards, both on its western edge near Mt. Gelmir and both requiring significant effort. The first involves a treacherous circumnavigation of the Shaded Castle through a poison swamp, evading giant slugs and pestilent flowers. The second, near Hermit Village, is a tactical nightmare. It demands clearing two separate hordes of enemies, with a glintstone sorcerer providing ranged support that must be prioritized. Acquiring these shards is often seen as a last resort for those avoiding Ranni's quest but still desperate for Seluvis's wares.
❄️ Mountaintops of the Giants: The Frozen Caches
The frigid Mountaintops hold the final two shards. One is southwest of Castle Sol, on a cliff tier near the Minor Erdtree. Approaching from the south risks aggroing the terrifying Death Rite Bird, while coming from Castle Sol means braving magical lightning storms. The safer route is from the Castle Sol Rooftop site of grace.
The final shard is a test of stealth and speed. From the Foot of the Forge Grace, head north then east toward a cliff with two passive giants. Sneak behind a tree to find the astrolabe, but beware the Giant Fingercreeper lurking in the ground before it. A wise Tarnished comes armed with fire—a spell, incantation, or grease—to cause the creature to spasm, allowing for a safe dispatch and the final, satisfying addition to a complete Starlight Shard collection. In the end, these fragments are less like collectibles and more like cryptic keys, each one unlocking a deeper layer of the Lands Between's cosmic mystery.
Comments