My Foolproof Methods for Hunting Invisible Scarabs in Elden Ring
Invisible scarabs in Elden Ring offer rare rewards; master their glowing trails and timing for satisfying, frustration-free hunts.
If you’ve spent any serious time in the Lands Between, you already know the drill — glowing trails, weird jingling sounds, and a feeling that something’s darting past just out of sight. Yep, those are the invisible scarabs, and they’ve driven me absolutely crazy more times than I can count. But once you figure out the dance, they become some of the most satisfying (and rewarding) critters to hunt. I’m going to walk you through everything I’ve learned about finding and killing them, so you never have to swing at thin air in frustration again.
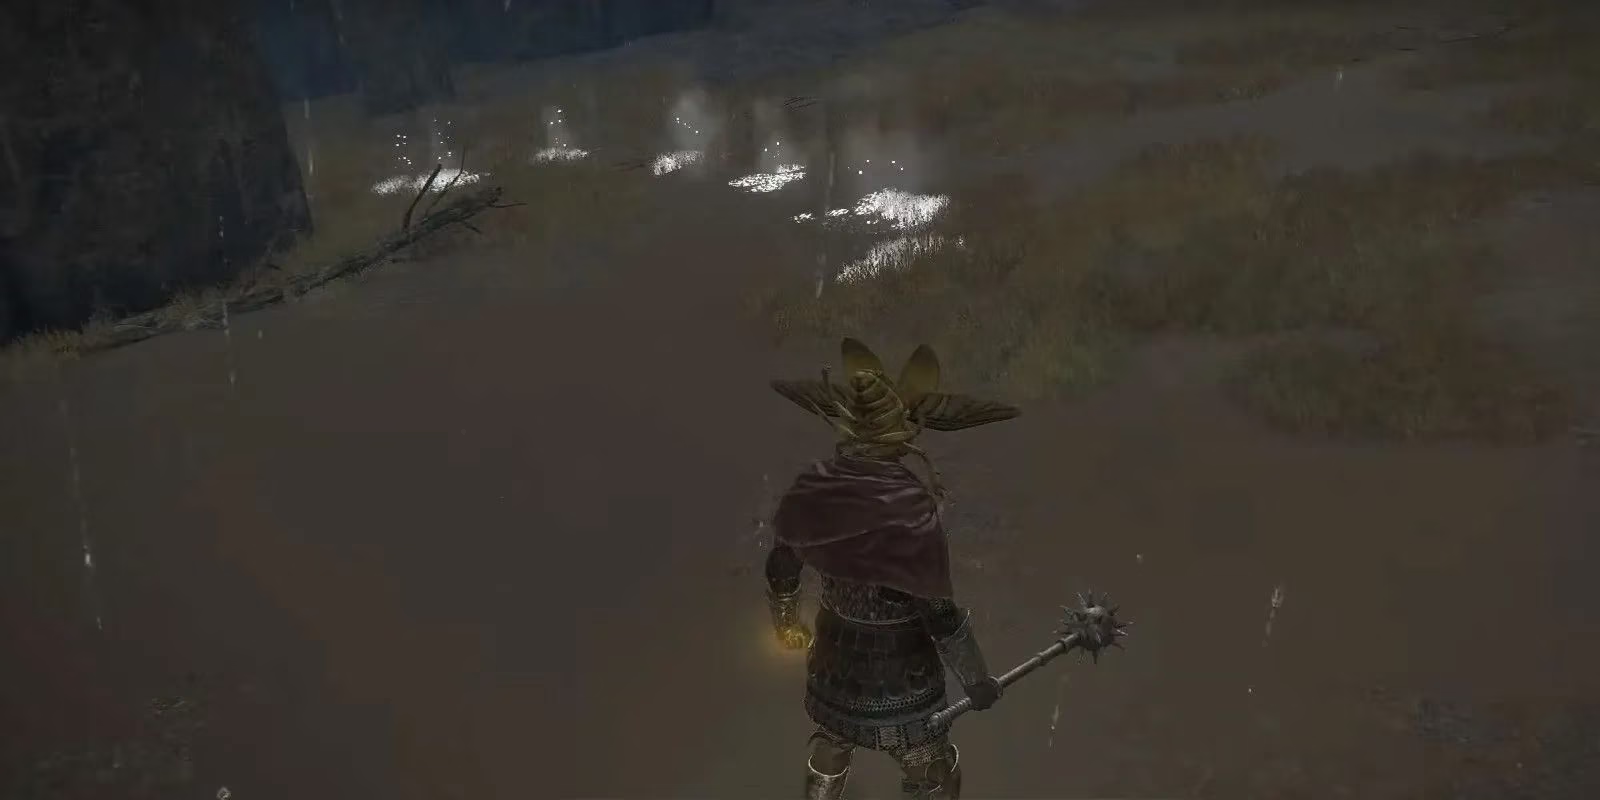
At first glance, these creatures just seem like another punishing joke from FromSoftware. Unlike the visible beetles that drop easy ashes of war or smithing stones, invisible scarabs can’t be targeted, move like they’ve chugged three flasks of Crimson Tears, and vanish into nothingness if you spook them. The payoff, though, makes the chase worth it — often they drop rare sorceries, incantations, or unique ashes of war that you simply can’t grab anywhere else. If you’ve ever wondered why your spell collection feels incomplete after clearing a region, chances are you missed one of these little ghosts.
How do you even spot something that’s invisible?
The answer is the glowing trail they leave behind. Each scarab follows a looping, fixed path, and as it scuttles along, bright shimmering footprints appear on the ground. You’ll also hear a metallic, ringing footstep sound that cuts through ambient noise. These two cues together are your lifeline. I always pause for a solid minute when I stumble into a suspicious open area — if you rush in, the scarab can get out of range before you even know it’s there. Trust your ears, then your eyes.
Once you’ve confirmed an invisible scarab is in the area, resist the urge to chase it. Seriously, don’t sprint after the trail. You’ll just exhaust your stamina and make the timing windows worse. Instead, observe the path for a couple of loops. Most paths have stretches where the beetle runs in a relatively straight line, and that’s where you want to set up your ambush.
Timing the strike is the real skill check here.
Stand near the straightaway, watch the glowing trail come toward you, and swing when it’s right on top of your position. Even with a straight path, the hit window is tiny — think of it like a parry timing, but with a moving invisible target. Greatswords, halberds, or weapons with long reach give you a bit of forgiveness. I’ve had plenty of whiffs where my blade passed through empty air because I was a millisecond too early or too late. Don’t get discouraged. Every scarab has its own rhythm.
Now, not all of us are blessed with perfect timing after a 12-hour binge session. So let’s talk about the easiest ways to cheese these encounters.
Area of Effect (AoE) attacks are your friend.
Spells like Cannon of Haima, waves of destruction, or even the humble firebomb can sometimes clip the scarab if you aim at the ground behind the glowing trail. I’ve had mixed results with this method — it works maybe 6 times out of 10 — but when it connects, you skip the headache entirely. The issue is that many AoE animations are slow, and the scarab can easily outrun the damage zone. Still, worth a shot if you’re struggling.
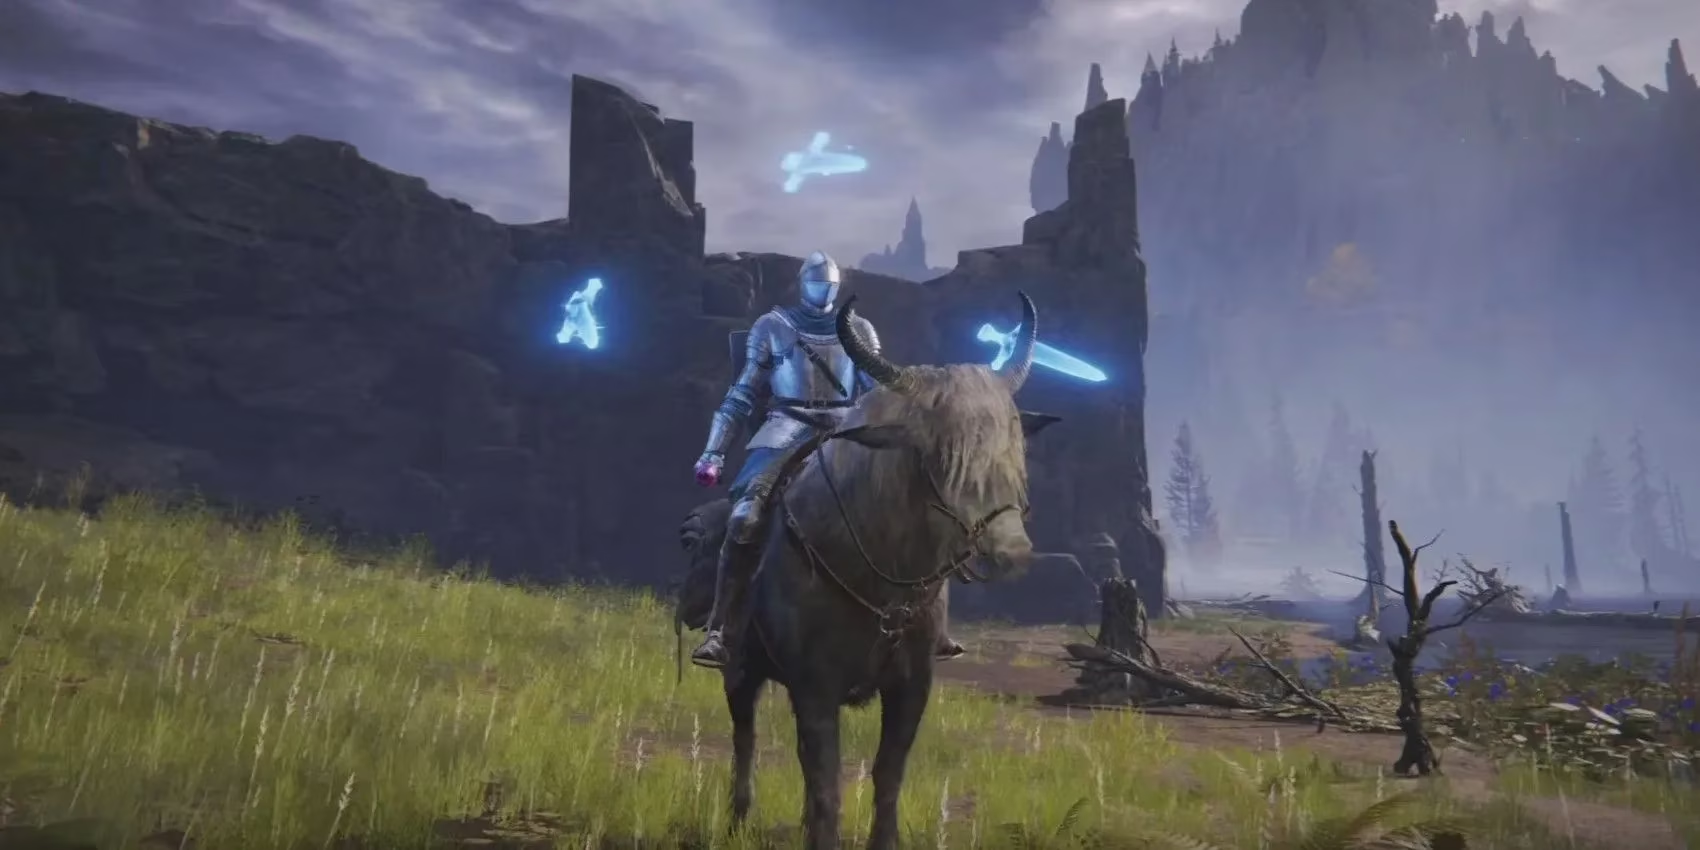
The absolute game‑changer for me was discovering Phalanx sorceries.
The whole family — Glintblade Phalanx, Greatblade Phalanx, even the ash of war version — summons floating swords above your head that automatically fire at nearby enemies. And the best part? They target invisible enemies. The swords hover, detect the scarab as it runs its loop, and lunge without you needing to time a single attack. It’s like having a tiny, judgmental hit squad following you around. I now keep Glintblade Phalanx permanently slotted when I’m exploring new zones, specifically for those moments when I hear that jingling. Just cast it, stand on the scarab’s path, and let the magic do the work. Most of the time, the blades shred the scarab before I even see the trail fully.
If you don’t have the intelligence or FP to cast the sorcery, don’t worry. FromSoftware gave us a spectacular backup plan: Rogier’s Rapier. This weapon comes with the Ash of War: Glintblade Phalanx already attached, which means any build can summon the autotargeting blades as long as you can wield the rapier. I’ve used it on pure strength builds with zero intelligence investment, and it works flawlessly. Just two‑hand the rapier, activate the skill, and watch the magic fly. The scarab will pop before you can even celebrate.
Now, where do these little tricksters actually live? Here’s a quick breakdown of all known locations as of 2026:
-
🏖️ Limgrave – On the beach directly west of the Church of Elleh. The trail is easy to spot against the sand.
-
🌊 Liurnia of the Lakes – Southeast of the Main Caria Manor Gate. Watch out for the giant lobsters in the area; they don’t appreciate your beetle hunt.
-
⛰️ Altus Plateau – Two spawns here. One on the lake north of the Sealed Tunnel, and another north of the Erdtree Sanctuary Site of Grace in Leyndell, Royal Capital. The Leyndell one often gets tangled in architecture.
-
🌋 Caelid – First, south of Sellia Crystal Tunnel near the Waypoint Ruins. Second, near the Fort Gael North Site of Grace. Bring fire resistance; the rot dogs will interrupt you if you’re not careful.
-
❄️ Mountaintops of the Giants – Two more. One on the northern edge of Freezing Lake, close to the Site of Grace. The other is on the tallest rock pillar east of Ordina, Liturgical Town. The rock pillar one is a nightmare to reach, but the drop is usually a high‑level ash of war.
I always recommend clearing out nearby enemies before you start hunting the scarab. Nothing’s worse than lining up the perfect Phalanx‑assisted kill only to get poked by a stray imp and despawn the target.
Over the years, my mantra has become: be patient, bring Phalanx, and listen for the jingle. These invisible pests are no longer a source of rage but a little treasure hunt that breaks up the constant boss fights. Whether you use a colossal weapon with meticulous timing or let the floating swords do the dirty work, every kill feels like a tiny victory worth the effort.
One last piece of advice — after you kill a scarab, its drop appears just like any other item. Don’t walk away thinking nothing happened because you didn’t see a body. The runes are still there, and the shiny pickup is on the ground. Grab it, pat yourself on the back, and mark it off your mental checklist. These rare rewards can completely change your build options. Now get out there and start hunting — the Lands Between isn’t going to explore itself.
Comments